Capture One Pro 23
$299.00
This is for a perpetual license of the Capture One Pro software. This means that you can continue to use Capture One 22 or any previous versions of the software (Capture One 21, Capture One 20, etc) for as long as you want. If/when you want to upgrade to a newer version of Capture One, you can do so at the Capture One e-store for a fee.
Capture One Pro 23 offers a bunch of new tools and functionalities to make your workflow more efficient and flexible. Here’s a rundown to get you excited to work faster, together, and, ultimately, less.
1. Get the right look with Smart Adjustments
Getting a consistent look across many images can be difficult and time-consuming if they are shot under different lighting conditions. Smart Adjustments are here to help automate that part of your workflow. The new tool, which has been designed for portrait, wedding, and event photographers, uses faces and skin tone as guidance to determine which adjustments to make to your photos.
The most critical adjustments for achieving a consistent look are Exposure and White Balance. With Smart Adjustments, these can now be automatically tuned to match a reference image of your choosing.
How to use Smart Adjustments
So how do you use Smart Adjustments? Simply follow these steps:
1. Edit one image to your liking with Exposure and White Balance.
2. Find the Smart Adjustments Tool in the Adjust Tab.
3. Hit “Set as Reference”. A thumbnail will now indicate that the reference is saved.
4. Then select one or multiple images and hit “Apply”.
By default, both Exposure and White Balance will be adjusted but you can set this yourself using the tick marks. Smart Adjustments will then try to match the look of your selected images to the reference image.
Save your reference as a Smart Style
As you will see, the Smart Adjustment tool has a “Save Style…” button as well. This allows you to save your reference as a Smart Style for future use by including Smart Exposure and/or Smart White Balance. You can, for example, make a Smart Style that simply fixes White Balance in your portraits that you can apply directly during import.
But why stop there? Smart Styles can include any other adjustment as well. This allows you to make one-click Styles that will adapt White Balance and Exposure to your image – if you’re photographing people. Depending on your editing habits, reference, and images, you will be able to finish 70-100% of your editing in a single click by using a Smart Style.
Four images edited with a Smart Style to get a consistent look. One-click batch edit:
Why not just copy/apply adjustments?
Copy/apply can work perfectly fine for your images if they are shot under the same conditions and have the same starting point. This could for example be studio portraits with controlled lighting setups. But some images do not fit this description. You might be shooting outside, where the light can change from one shot to the next, or inside a poorly lit room. Smart Adjustments will help you greatly in these cases. Instead of matching adjustment values, it matches the desired result.
How do Smart Adjustments work?
Smart Adjustments will try to match the light and color of faces while taking the environment into account. It’s designed this way to make sure the results look natural. This also means that Smart Adjustments will not provide exact identical values in the adjustments between images, even if the images are almost the same. If you need the same values between images, you can copy/apply them instead.
Learn more about automated photo editing here
2. Faster culling and upgrades to the importer
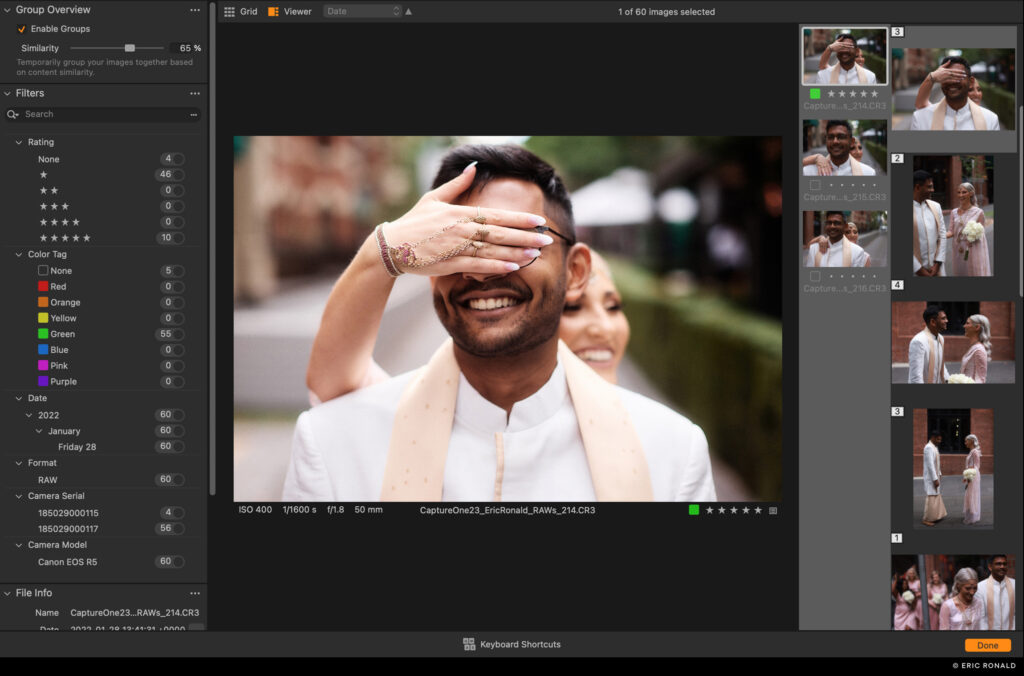
Culling thousands of images can be a tedious task. Capture One Pro 23 comes with new features to make the culling process faster, easier, and more enjoyable. Available both from the Importer and a new dedicated Cull view, you can benefit from zero-delay browsing, group view of similar images, star ratings and color tagging, zoom to 100%, filtering, and the ability to change capture time.
Make your selections before importing…
Some photographers like to throw away the trash before they even copy their images from their cards. To do this, you need a way to review your images directly on the card, preferably with great performance. The importer in Capture One Pro 23 offers all the above and allows images to be reviewed in a large size, making your photo culling easier.
You can star rate, color tag, or use the simple pick functionality. The pick functionality decides which images you import, while the color tags and star ratings are metadata that is applied to the images for further use.
To easily compare similar images, you can enable “Group Overview”. All the images will be divided into groups based on their similarity. This is especially useful in Viewer mode, where an extra browser shows the images in each group, and the standard browser shows the groups. In this view, it’s easier to evaluate what you want to keep. If the groups are not created as you want them, you can increase or decrease the similarity to make the groups larger or smaller.
… or use the brand-new Cull view
If you prefer to import everything into Capture One Pro before you make your selections, or if you have been shooting tethered, the Cull view offers the same speed and grouping functionalities as the Importer. It’s available from the top toolbar next to the Import and Export icons.
Both views use the embedded previews of the RAW files. This provides great performance. However, depending on the in-camera settings and camera manufacturer, the colors and resolution might differ from the RAW file.
Learn more about how to speed up your photo culling here
3. More control with Layers in Styles
One of the most requested features for Styles has been the ability to include Layers. This new functionality in Capture One Pro 23 adds a new layer (pun intended) of flexibility to the workflow and makes Styles even more powerful. Here are some ways they can benefit you.
Combine multiple Styles into one
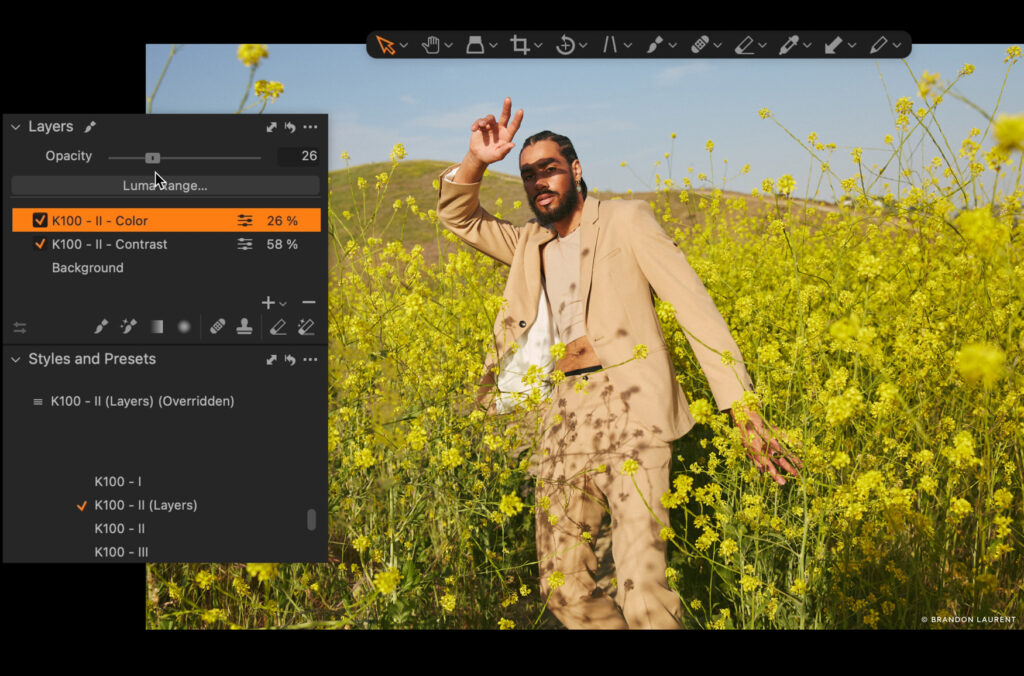
Many photographers have found that mixing two or three Styles as Layers and reducing their opacities can result in quite interesting edits. With the support for Layers in Styles, it is now possible to save those edits as Styles to use again and again. The opacity of each Layer will be included in the Style as well.
Apply a Style as a Layer with reduced opacity
Another requested feature has been to always apply a Style at reduced opacity when applying it as a new Layer. This allows easy control of the Style since the opacity can be used to both increase and decrease the effect. To make a Style that can be applied like this, simply apply it to a clean image as a new Layer, reduce the opacity to what you want, and save that as a new Layer (from the Styles and Presets tool).
Split adjustments into multiple Layers
Putting color and contrast adjustments onto their own separate Layers can make Styles much more flexible to use. This allows you to reduce or increase the impact of each part of the Style without affecting the other.
Layers with adjustments can be included in a Smart Style, just like any other Style. However, the Smart Adjustments will always apply to the Background.
Learn more about Smart Styles here
4. Change capture time
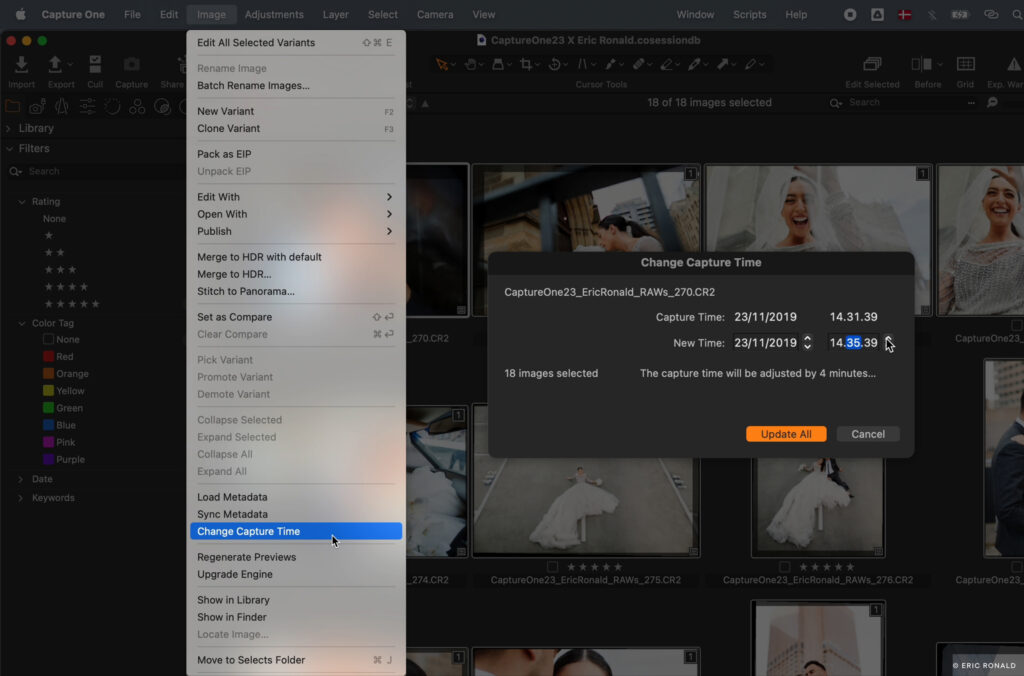
There’s nothing more infuriating for an event photographer than having shot an event with multiple cameras that were not synchronized to the same time setting. If the difference is big enough, the chronological order of the images will be completely off. The only way to correct this is by changing the capture time on the images from one or both cameras. Traveling photographers also know this issue if they haven’t updated their cameras to match the time zone they are shooting in.
It’s now possible to fix this with Capture One Pro 23. From the Image menu, the Metadata Tool, or the File Info Tool in the Importer or Cull view, you can change the capture time on the selected images.
The updated capture time will not be embedded directly into the RAW file but will be applied as a sidecar setting. This means that it will not be visible from other applications when browsing the raw files. However, it will be included when exporting images to ensure the correct order of delivery.
5. Variant redesign for better Album organization
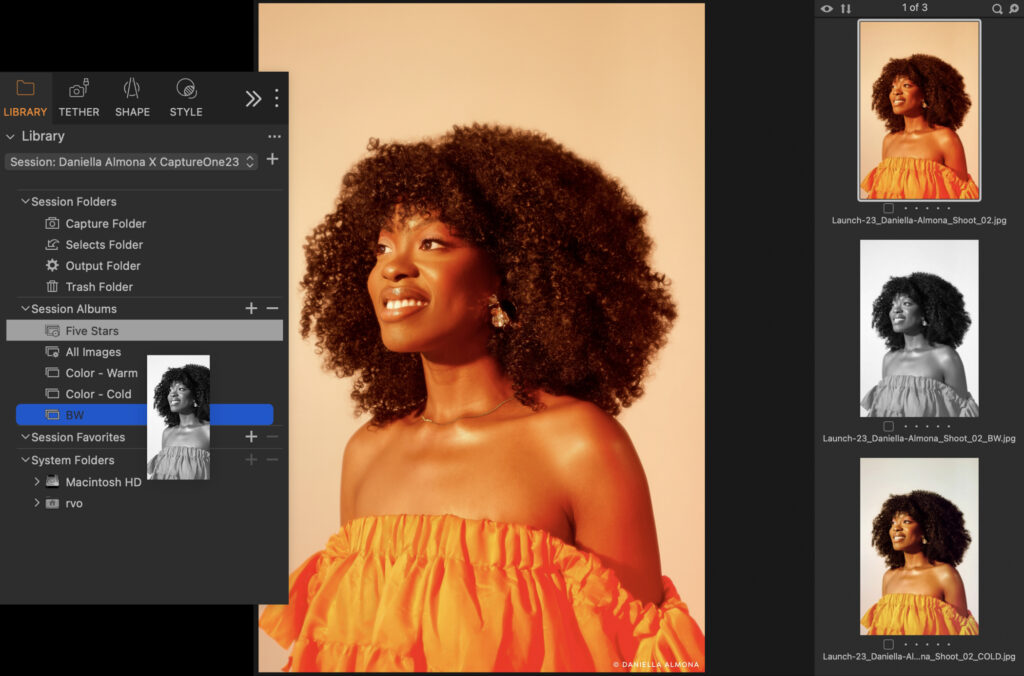
If you’ve ever made multiple variants of the same image and tried to put them into different Albums, you’ve probably noticed that the variants stick together. It was not possible to distribute variants into their own Albums unless you did cumbersome tagging and used Smart Albums.
Those days are over as the behavior of variants has been improved to allow individual organizing. Now, you can simply drag variants into Albums as you please without the primary variant tagging along.
6. Capture One Live for everyone
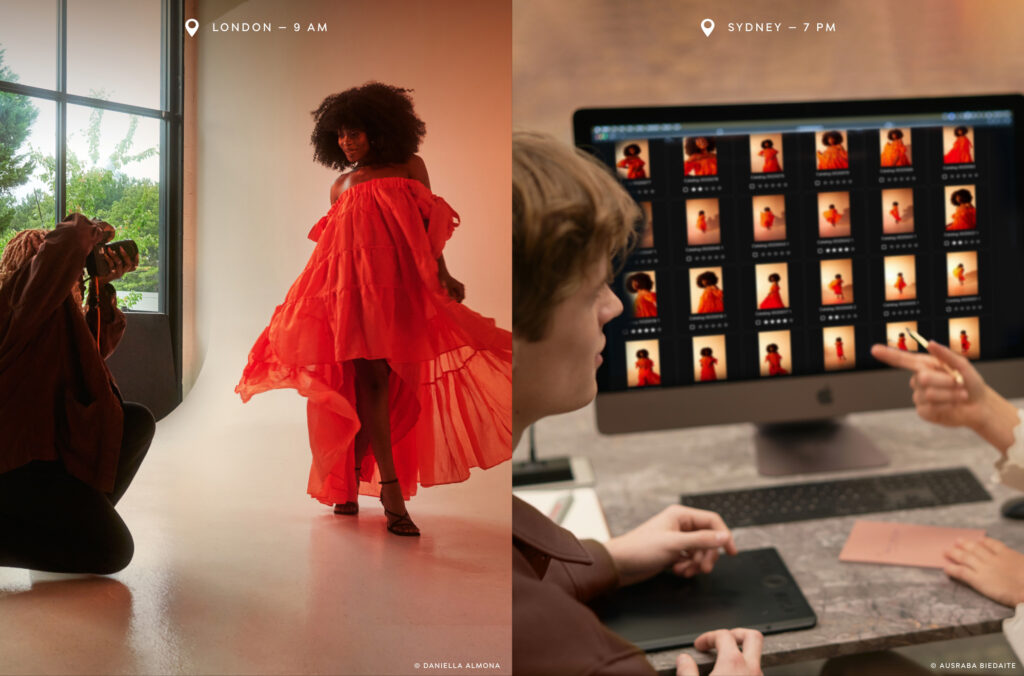
Capture One Live is now free for everyone. Yes, you read that right! From now on, everyone can share online sessions with their collaborators and clients. This free version of Capture One Live comes with a few limitations, such as session duration and how many sessions you can have running at once.
Read more about what is included in the free version of Capture One Live here
Those who need more security when sharing their images can now get more control over who can view their Live sessions with reviewer management in Capture One Live Unlimited. You will now be able to invite only the people you want to the online Live Session, setting different permissions for different users to make sure your photos stay safe. The people who have permission to view the session will also be able to comment in their own name, making it easier to collaborate with and get feedback from multiple people.
To make it easier to go share your images, you can now activate your Capture One Live sessions when you create new Albums or directly from each collection by right-clicking them. We have also removed the annoying “Load more” button on the web page – you won’t have to click to see your photos anymore.
All in all, Capture One Pro 23 brings improved efficiency to your workflow, helping you spend less time on tedious tasks and leaving you with more time to create beautiful, high-quality images.
Related products
Capture One


